Best IR Thermometer
Updated December 11th, 2019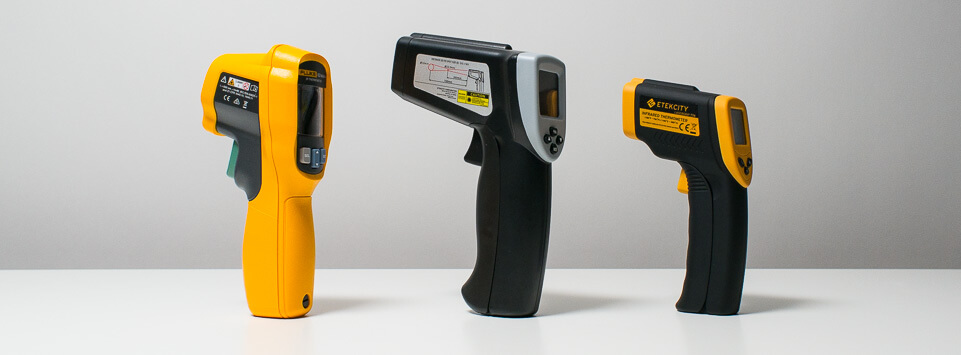
Don’t be fooled. Super cheap “budget grade” IR thermometers do not provide the same accuracy and overall performance as their much more expensive professional grade counterparts.
But is the extra cost of a professional grade unit worth it? What should you be looking out for to determine whether you can get away with buying a budget model or whether you’ll have no other option but to spend more on a more professional grade unit? Let’s take a look.
Features
Make an informed purchase. These are the features you should look out for when shopping for an IR thermometer.

Emissivity
You’re in your kitchen performing a very simple but exciting science experiment to test the accuracy of your brand new IR thermometer – you’re boiling water inside an aluminum pot. You already know that the boiling point of water is 212° F so you know that inside the pot, the water is boiling at 212° F. You also know that the pot itself must be at a temperature very close to 212° F. You grab your newly purchased IR thermometer, scan the water and the thermometer displays a reading of 212° F. Great! It works! You scan the side of the pot and the thermometer displays a reading of 100° F.
Puzzled, you scan again – 100° F. What’s the problem? You know the side of the pot is at a temperature very close to 212° F, if not right at 212° F. Why is the thermometer telling you otherwise?
The answer? Emissivity.
That word – emissivity - sounds complicated doesn’t it? Unfortunately, you’ll absolutely have to understand it or at least understand how it applies to IR thermometers for you to pick the right thermometer for your application. An explanation follows below.
What is emissivity?
Everything’s made up of atoms. At temperatures above absolute zero these atoms move. The movement of these atoms gives off IR radiation. An IR thermometer detects this radiation.
This is how an IR thermometer works – it detects the amount of IR radiation surface materials emit at different temperatures.
Here’s the problem. The amount of IR radiation a surface material emits only tells half the story of the material’s temperature. For the IR thermometer to give an accurate temperature reading it needs to also know how efficiently the material can emit the radiation. If it’s a poor emitter this needs to be compensated for. Likewise, if it’s a good emitter this needs to be compensated for also.
And so, an IR thermometer needs two pieces of information to take an accurate reading:
- The amount of IR radiation emitted by the material
- The efficiency with which the material can emit IR radiation
Emissivity is the term we use to describe that second piece of information - the efficiency with which a material can emit IR radiation.
IR thermometers – not as simple to use as they seem
You know that an IR thermometer detects the amount of IR radiation a surface material emits. You know that it needs to “know” the efficiency with which the material can emit that radiation before it can take an accurate reading – it needs to “know” the material’s emissivity. So how does it come to “know” the material’s emissivity? Is it detected automatically?
Unfortunately, it isn’t. Each time you want to measure the surface temperature of a particular object it will be up to you to
- Determine the identity of the material that comprises the object’s surface
- Look up the material in an emissivity table
- Input the number listed next to that material in the emissivity table into the thermometer
Only after completing these 3 steps will you be able to obtain an accurate reading.
Fixed Emissivity
All of this sounds a bit complicated, doesn’t it? It is in fact, likely a far cry from what you might expect to be able to do with an IR thermometer – to be able to point it at any object and instantly get an accurate temperature reading with no further work required.
And many IR thermometer manufacturers would agree with you. Their solution? Fixed emissivity.
You see, many common household materials have an emissivity at or close to 0.95 (food, water, paint and paper are some examples). IR thermometers with a fixed emissivity of 0.95 (the chosen value for all IR thermometers with fixed emissivity) are able to measure the temperature of all of these items quite accurately.
But then you run into a scenario like the one described earlier. You aim your fixed emissivity IR thermometer at a highly reflective surface (the side of a polished aluminum pot), and there’s a good chance it’s going to give you a temperature reading that’s nowhere close to the actual temperature of the surface.
Manufacturers of budget IR thermometers are banking on the fact that you’re unlikely to use their thermometers to measure the temperature of these types of surfaces. If and when you do, an IR thermometer with fixed emissivity will not be able to take an accurate temperature reading of the surface.
Adjustable Emissivity
It is our strong recommendation that you buy an IR thermometer with adjustable emissivity – such a thermometer will allow you to input a particular emissivity value into the thermometer before taking a reading.
An IR thermometer with adjustable emissivity allows you to get an accurate temperature reading of any surface, no matter what material the surface is comprised of.
Back to the original problem – water inside an aluminum pot
The water inside the pot had an emissivity value close to 0.95 – the default setting for IR thermometers that feature adjustable emissivity and the only setting for IR thermometers that feature fixed emissivity. The side of the aluminum pot has an emissivity value much different than that of water – close to 0.1 – the lowest emissivity setting for thermometers that feature adjustable emissivity.
Let’s say you purchase a budget IR thermometer with a fixed emissivity setting of 0.95. If this were the case there would be no way for you to adjust settings on the thermometer to accurately measure the temperature of the side of that aluminum pot (which has an emissivity value close to 0.1).
If you purchase a more expensive IR thermometer with adjustable emissivity you would need to look up the emissivity of polished aluminum in a table, input the correct value (0.1) into the thermometer, and only then would you be able to take an accurate reading of the side of the pot.
Note
There is a way to get around the limitations of a fixed emissivity IR thermometer. You can place non-reflective tape (with an emissivity value of 0.95) over the surface you need to measure and then take a reading of the area covered by the tape. While doing so will give you a more accurate reading without adjusting emissivity, this method has several shortcomings:
- The surface you need to measure may already be very hot or very cold, making it difficult to put tape over it.
- The surface you need to measure may be out of reach, making it impossible to put tape over it.
- The surface you need to measure may be comprised of a material that tape won’t stick to.
- The tape itself has a limited surface area. The spot the thermometer is measuring may be larger than the width of the tape, which will also give inaccurate readings.
- You need to wait several minutes (some manufacturers recommend waiting 30 minutes) for the tape to adjust to the temperature of the surface before taking a reading.
The bottom line? There’s absolutely no need to have to worry about the limitations of this tape trick in the first place - just buy a thermometer with adjustable emissivity.
Accuracy
Reading down the spec sheet of a typical IR thermometer you’ll see accuracy listed in the same table as weight, size, and operating temperature, among other things.
The thermometer’s weight is a hard and fast rule. The thermometer weighs a certain number of ounces or grams and this requires no further explanation.
Its size is also a hard and fast rule. The thermometer has certain dimensions measured in inches or centimeters and this requires no further explanation.
The range of temperatures it can measure – its operating temperature - is also a hard and fast rule – the thermometer will work within the specified range and it will not work outside of the specified range. This requires no further explanation.
But what about accuracy? The accuracy specification is usually listed as either a plus or minus number or a percentage. The Fluke 62 Max+, for example, is listed to be accurate within plus or minus 2° F or 1% of the measured reading - whichever is greater – at temperatures at or above freezing (32° F).
Manufacturers list these numbers like they’re a hard and fast rule - just like size, weight, and operating temperature. But are things really this simple when it comes to IR thermometer accuracy? Can accuracy really be treated like and listed in the same table as every other specification – as a given value with no further explanation? We don’t believe it can.
A closer look at IR thermometer accuracy
You see, many IR thermometers are not nearly as accurate as their manufacturers claim that they are, at least not
- when they first show an initial reading and
- when you use them under certain conditions
To explain what we mean by this we need to first introduce another specification you might run into when reading through a typical IR thermometer’s spec. sheet - response time. This number is usually listed in milliseconds. The Fluke 62 Max+, for example, has listed response time of less than 300 ms. Next to this time, listed in parentheses is “95% of the reading”. This means that Fluke claims that you can obtain a reading within 5% of the final measured reading within 300 ms of a trigger pull. We tested the 62 Max+ and found this to be true. We pulled on its trigger and almost immediately the thermometer’s LCD displayed a reading within 5% of the final measured reading.
Here’s the problem. The Fluke 62 Max+ is a professional grade IR thermometer. It’s a really good thermometer – one of the best IR thermometers on the market.
Many IR thermometers on the market or not professional grade. They do not read the final measured value nearly as fast. So while the accuracy of the 62 Max+ may look very similar to that of much less expensive models if you compare their specifications side by side and take them at face value – these specifications don’t tell the whole story.
Take the Etekcity 630 as an example. It normally retails for less than a quarter of the price of the Fluke 62 Max+. It’s listed to be accurate to within 2% of the measured reading at temperatures above 212° F with a response time of 500 ms.
Now, you may compare these two models (the Fluke and the Etekcity) side by side and say 2% vs 1% for accuracy isn’t much of a difference. And that 500 ms vs 300 ms isn’t much of a difference either.
But here’s the thing. First of all, the Etekcity 630 doesn’t really have a response time of 500 ms. It takes about that long for the LCD screen to turn on but it doesn’t display an actual reading until at least 2 seconds after you pull its trigger.
At this point – 2 seconds later – it shows an initial reading. At lower temperatures (below 200° F) this initial reading is quite close to the final reading – the same as is true for the Fluke. But at higher temperatures (over 200° F) the 630 often gives an initial reading more than 10, 20° F away from the final reading. It then takes several more seconds for it to settle on a final reading.
But the fun doesn’t stop there. After it settles on a final reading it often bounces up or down to a different reading 10 or 20 degrees above or below the actual temperature.
This type of behavior is typical for a budget IR thermometer. And this is exactly the type of behavior you won’t have a clue is a possibility when reading and comparing manufacturer specifications for accuracy and response time.
So, in summary: be wary of manufacturer specifications for accuracy. Budget thermometers often exhibit the following behavior:
- They give a much different initial reading than their final reading at certain temperatures.
- They take a long time to settle on the final measured reading at certain temperatures.
- They may “bounce” between reading the actual temperature and some other temperature. Which is the correct temperature? During testing we were well aware of the actual surface temperature of the surfaces we were taking readings of. We also had more expensive models to compare cheaper thermometers to. You won’t have the same luxury should you purchase only one budget IR thermometer for yourself. So think about whether this type of behavior will be acceptable to you.
Distance to Spot Ratio
An IR thermometer measures the surface temperature of a circular area – a spot. The size of the spot changes depending on how far the thermometer is held away from the surface.
The further the thermometer is moved away from the surface, the larger the area being measured.
The closer the thermometer is moved toward the surface, the smaller the area being measured.
An IR thermometer’s distance to spot (D/S) ratio describes this phenomenon – it describes the relationship between the distance the thermometer is held away from the surface and the size of the spot.
The first number of the ratio represents the distance the thermometer is held away from the surface. The second number represents the spot size. For example, a thermometer with a 10:1 D/S ratio will measure a spot 1 inches in diameter when held 10 inches away from the surface. The spot size will grow to 2 inches when the thermometer is held 20 inches away from the surface, and so on and so forth.
Here’s why D/S ratio is important – high D/S ratio advantages
1. The higher the D/S ratio, the smaller the size of the spot being measured at any distance.
For example, a thermometer with a 50:1 D/S ratio held 100 inches away from a surface will measure a spot with a 2 inch diameter. A thermometer with a 10:1 D/S ratio, held the exact same distance away - 100 inches away from the target - will measure a spot with a much larger 10 inch diameter.
The higher D/S ratio thermometer keeps this small spot advantage no matter how far away you hold each thermometer from the surface. If you move both thermometers closer to the surface – say 50 inches away – the 50:1 model will have a spot size of 1 inch (still smaller) while the 10:1 model will have a spot size of 5 inches (still larger). If you move both thermometers further away – say 200 inches away – the 50:1 model will have a spot size of 4 inches (still smaller) while the 10:1 model will have a spot size of 20 inches (still larger).
If you need to measure the temperature of small spots at any distance you’ll need an IR thermometer with a high D/S ratio.
2. The higher the D/S ratio, the further you can be from the spot you want to measure.
A thermometer with a 50:1 D/S ratio can be held 50 inches away from the target to measure a 1 inch diameter spot. A thermometer with a 10:1 D/S ratio would need to be held 10 inches away to measure the same size spot.
If you need to measure a relatively small spot from a large distance away from the surface then you’ll need an IR thermometer with a high D/S ratio.
D/S ratio is not a deal maker or a deal breaker
Most applications will not require an IR thermometer with a D/S ratio greater than 10:1. You can always move closer to the surface with a low D/S ratio thermometer to obtain a small spot size (this negates advantage #1 above). Few applications require you to measure a very small spot size from far away (advantage #2 above).
At this point you may be thinking that
- there’s really no disadvantage to buying a high D/S ratio thermometer and
- there’s no apparent advantage to buying a low D/S ratio thermometer
So why would you ever buy a low D/S ratio thermometer over a high D/S ratio thermometer?
The answer – price. Manufacturers know that high D/S ratio thermometers are only required for very specific professional work and price them accordingly. High D/S ratio IR thermometer pricing starts at around $200.
Lasers
Above we discussed how the size of the spot that you’re measuring changes as you move toward or away from your target. But how do you know the exact location and size of the spot at any particular distance?
The answer? Lasers.
Most IR thermometers come equipped with either one or two lasers. The more lasers, the better.
Single laser thermometers only show you the location of the spot you’re measuring. The laser points to either the center, the bottom, or the top of the spot being measured. It’s up to you to determine how far away you are from the surface and thereby determine the size of the area you’re measuring.
Dual laser thermometers not only show you the location but also the size of the spot. As you move toward the target the lasers come closer together (as the spot gets smaller). Directly in between the two lasers is the spot being measured. As you move away from the target the lasers move farther apart (as the spot gets larger).
Everything Else
Temperature Range
An IR thermometer can only read temperatures that fall within a certain (manufacturer specified) range. This range varies from model to model but normally falls between about -20° F and around 1000 to 1200° F.
The specified range for the vast majority of IR thermometers on the market will be more than adequate for the majority of applications no matter how “limited” that range is. That is because even units with a more “limited” range still have a very wide range of several hundred degrees Fahrenheit.
Only concern yourself with an IR thermometer’s temperature range
- if you’re buying one for professional use and you need to measure the temperature of materials that exceed certain known extreme temperatures.
- if you’re considering buying an extremely cheap unit – these units are the only IR thermometers on the market that have a range limited to the point where you really need to pay attention to it before making a purchase. When looking at extremely cheap units look at their temperature range and consider whether that range will be sufficient for your application.
Overall Experience and Ease of Use
Your overall experience using an IR thermometer and overall ease with which you end up using it will vary greatly depending on the following 4 factors:
The size and clarity of the temperature read-out.
Some IR thermometers have large easy to read LCD displays while others have much smaller more difficult to read displays. We also found that some displays had a better viewing angles than others.
How quickly the device activates – response time.
Most IR thermometers have a manufacturer specified response time less than 1 second - pull the trigger and the thermometer displays the measured temperature in less than 1 second. Interestingly, we found that not all thermometers activate as quickly as their manufacturer claims that they do. The Etekcity 630, for example, has a manufacturer specified response time of 500 ms. The unit we tested took over 2 seconds to activate – more than 4 times slower than what is claimed by the manufacturer.
How quickly the device shuts off after taking a reading.
You pull the thermometer’s trigger to activate it. While you have the trigger pulled the thermometer is constantly updating temperature information on its LCD screen. Only when you release the trigger is a final temperature displayed on the screen. But for how long? Some units display this final temperature for over 20 seconds. Some for as little as 5 seconds.
You may need to write down temperature data as you collect it. To write it down you need to release the trigger and when you do, the longer the information stays on the screen, the better.
How difficult it is to select different settings.
For each of the thermometers we researched and tested, we not only looked at which extra features they had or didn’t have but we also took a close look at how well these features were implemented. For example, the Etekcity 630 requires you to hold down a button for 3 seconds to switch between degrees Celsius and degrees Fahrenheit. Doing so, also turns the backlight on or off. This is an example of a poor implementation of this extra feature.
Extra Features
An IR thermometer can be used for more than just measuring one temperature at one pinpoint location. Holding down the trigger of more advanced units will allow you to scan over an area and determine the average, maximum, and minimum temperature of the region that was scanned.
Some units will also allow you to scan one object and then another and then show you the difference in temperature between the two surfaces.
Other common extra features include
-
A backlight to illuminate the thermometer’s LCD display in low light applications.
- A low and high temperature alarm. The unit will beep or a message will flash on the display when the temperature of the scanned surface is above or below a set temperature.
- The ability to switch between degrees Celsius and degrees Fahrenheit.
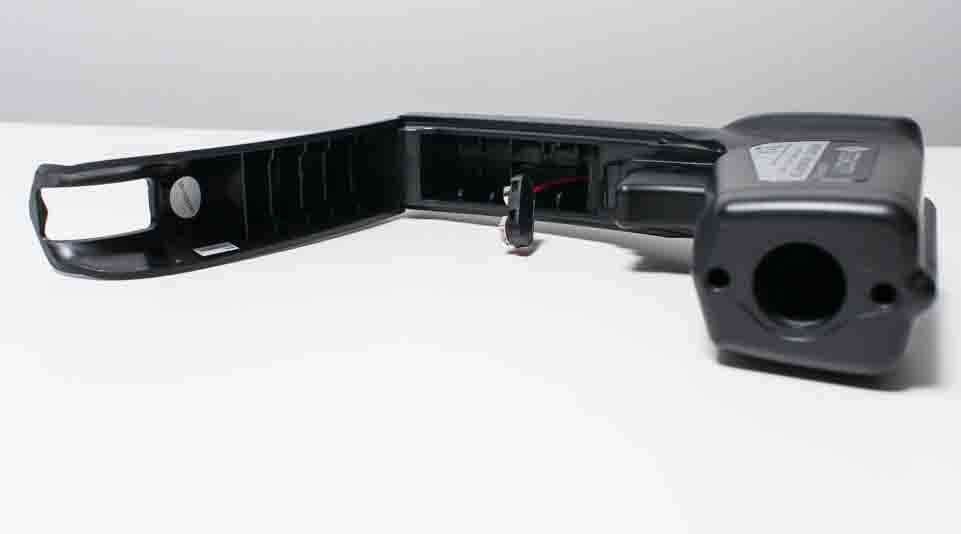
Battery
Not all of IR thermometers use the same type of battery. During testing we preferred units that used a AA battery instead of a 9V battery. Why? Replacing the batteries of 9V battery units required managing wires – making sure they wouldn’t pinch between the battery lid and the thermometer - the same wasn’t required for AA battery units.
Size and Shape
Depending on how you plan on using your IR thermometer, it’s size and shape may or may not be important to you. If you plan on using it very infrequently, you really don’t need to concern yourself with its size or ergonomics. A large thermometer that doesn’t fit your hand well will work just fine. But, if you do plan on using it often and/or for professional work, consider getting a unit that’s comfortable to hold and compact in size.
Durability and Warranty
We also took a close look at the build quality and warranty included for each IR thermometer we tested.
Top 3
Our reviews for the three best IR thermometers on the market.

Fluke 62 MAX+
Emissivity
The Fluke 62 MAX+ features adjustable emissivity for maximum accuracy no matter what material you’re scanning. Yes, you will have to identify the material you’re scanning, look up its emissivity in a table, and input the correct emissivity value into the thermometer each time you take a reading (of a different material). But these are required steps for taking an accurate reading with an IR thermometer.
An IR thermometer that doesn’t require you to do this work – a unit with fixed emissivity – isn’t doing you any favors. Such a thermometer is guaranteed to be extremely inaccurate taking readings of any material that doesn’t have an emissivity value of 0.95 – the fixed value that most fixed emissivity thermometers are set to.
The 62 MAX+ won’t have this problem. It is guaranteed to be accurate no matter what. Just remember to adjust its emissivity setting when necessary.
Accuracy
Like all other IR thermometers we tested, the 62 MAX+’s manufacturer specified accuracy is maximized near room temperature, reduced at mid to high temperatures, and greatly reduced at extremely low or extremely high temperatures.
Below 14° F the thermometer’s accuracy is only plus or minus 6° F. Accuracy between 14° F and 32° F is plus or minus 4° F. Accuracy above 32° F is plus or minus 2° F or 1% of the reading, whichever is greater.
Our hands-on testing of the MAX+ revealed these numbers to be accurate (no pun intended).
Temporary Accuracy
Earlier we talked about IR thermometer accuracy being more than just a number. We talked about how several IR thermometers we tested exhibited strange behavior when taking readings – behavior that made it difficult to take accurate readings quickly and with complete certainty.
The Fluke 62 MAX+ exhibited none of this behavior. During testing, it displayed temperature readings almost instantaneously upon trigger pulls. Many other thermometers we tested would immediately turn on (with their LCD display active), but many would take at least a few seconds to display temperature readings. Often these initial readings were nowhere close to the final readings these thermometers would settle on after keeping their triggers pulled for a few seconds.
The 62 MAX+ also did not exhibit any of the “bouncing” behavior we discussed earlier. It always gave only one final reading – the actual reading of the actual temperature.
Distance to Spot Ratio
The 62 MAX Plus has a distance to target (D/S) ratio of 12:1. The first number of the ratio (12) represents the distance between the thermometer and the surface. The second number (1) represents the size of spot on the surface that is being measured.
This means that if you hold the 62 MAX+ 12 inches away from the surface you want to measure, it will measure a spot with a 1 inch diameter on the surface. Moving it closer or farther away from the surface will affect the spot size according to the D/S ratio.
For example, holding the 62 MAX+ 24 inches away from the surface will increase the spot size to 2 inches. Holding it 36 inches away from the surface will increase the spot size to 3 inches, and so on and so forth.
During testing, we found the 62 MAX+’s D/S ratio to be more than acceptable for the vast majority of applications. Units with higher ratios did provide
- Smaller spot sizes
- The ability to measure smaller spots from further away
But we don’t find these advantages to be necessary for most applications. And we definitely don’t feel that paying for a higher D/S ratio thermometer is worth it for most users. If you do absolutely need an IR thermometer with a high D/S ratio our recommendation would be the Fluke 572. It provides a whopping 60:1 D/S ratio. But be warned, it also carries a hefty price tag. It normally retails for over $700.
Lasers
All of the IR thermometers we tested were equipped with lasers. Some featured only a single laser while others featured two lasers. The 62 MAX Plus features two lasers.
Single laser thermometers only show you where you’re aiming the thermometer – they show you the location of the spot being measured.
Double laser units like the 62 MAX Plus show you the location and the size of the spot being measured.
We consider this to be a crucial feature. Yes, you certainly could estimate the distance between you and the target and then use the thermometer’s D/S ratio to estimate the size of the spot being measured. But doing so would still result in an estimated size. Why guess when you can know for certain the exact size and location of the spot with a dual laser thermometer like the Fluke 62 MAX+?
Everything Else
Temperature Range
The Fluke 62 MAX+ has a temperature range of -22° F to 1202° F. This range is more than sufficient for the majority of applications.
Ease of Use
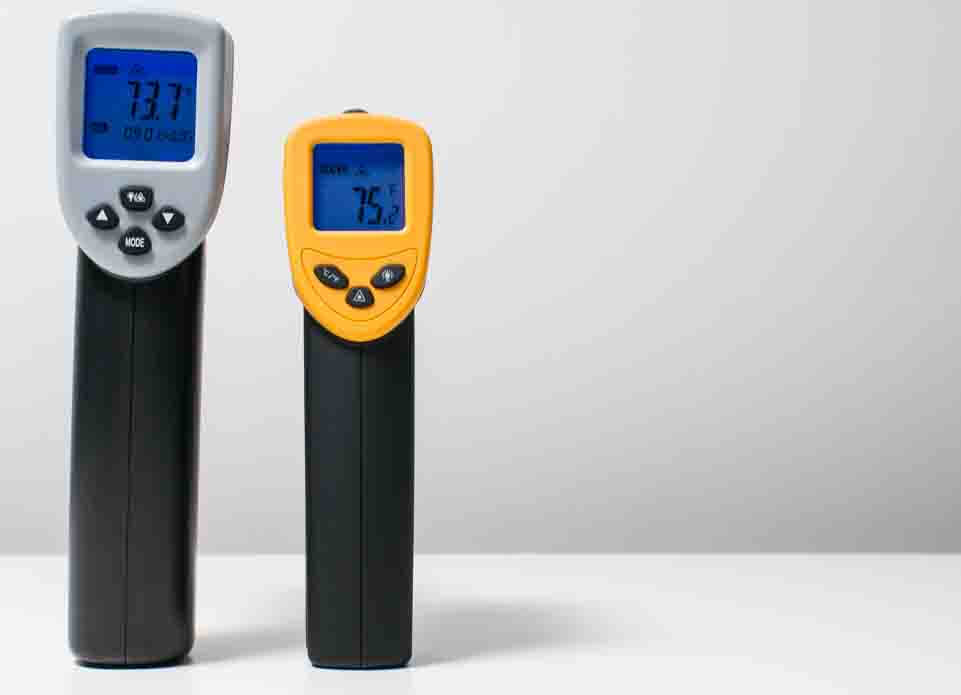
The Fluke 62 MAX+ has one of the larger LCD displays of any of the IR thermometers we tested. Its LCD display is also of a much higher quality than most displays on the budget thermometers we tested.
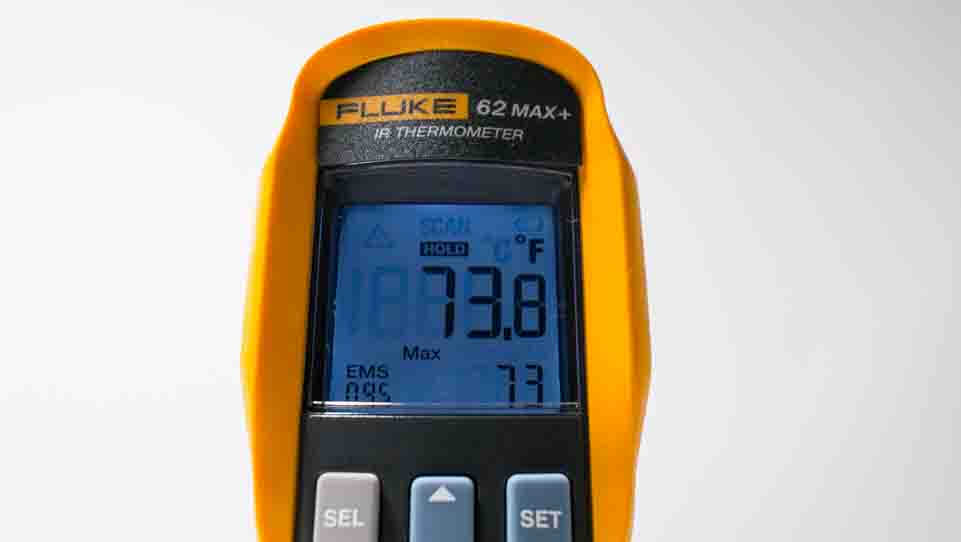
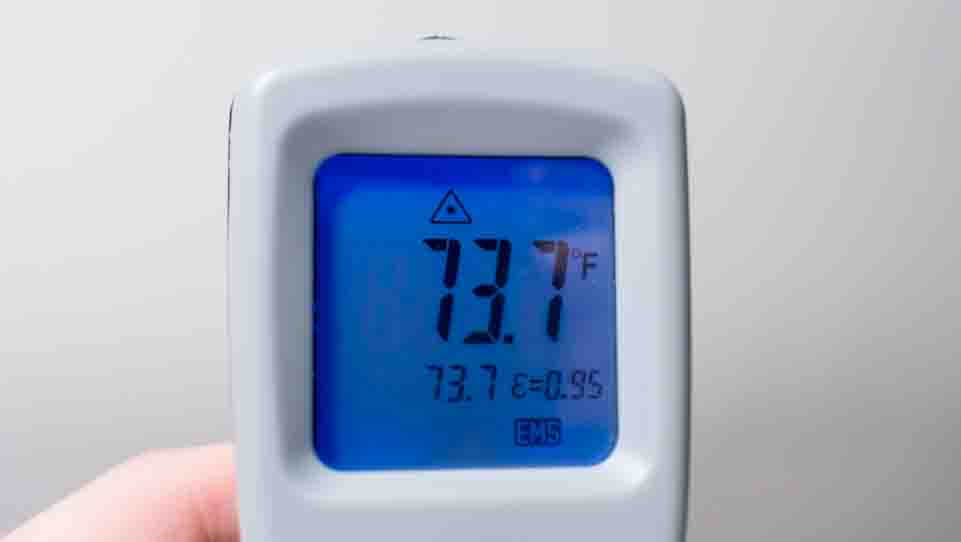
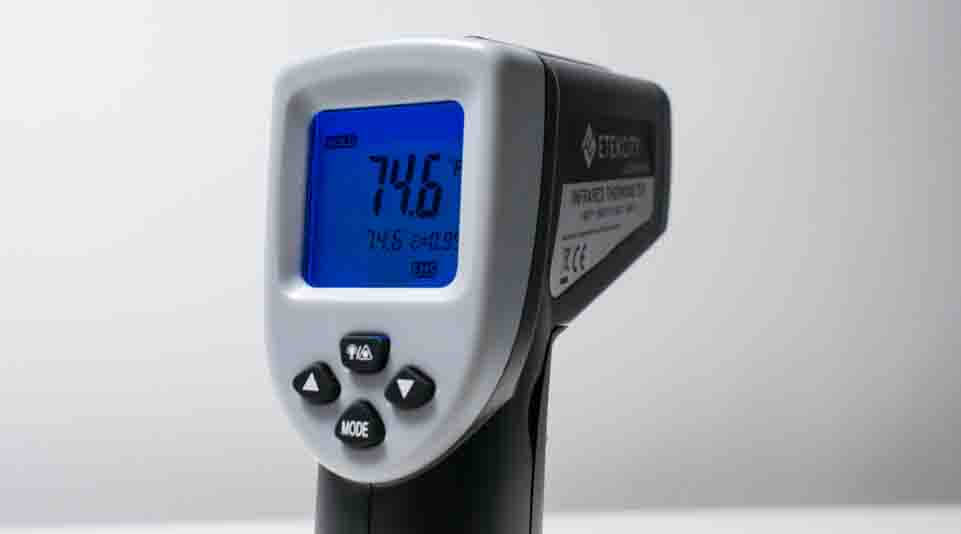
PHOTO > max vs budget model display (774)
Using the 62 MAX+ to take readings is quick and snappy. It reads out temperature almost immediately upon pulling its trigger.
This unit does turn off rather quickly after taking readings. The display shuts off about 6 to 7 seconds after you release its trigger. This does provide a bit of a challenge if you’re logging data and need to write down readings. You’ll have to memorize each reading as its unlikely you’ll be able to put the thermometer down and still be able to pick it back up fast enough to reference the reading on the display to write it down. On the positive side of the things, the fact that the display turns off so quickly does provide for better battery life.
Selecting different settings using the MAX+ involves hitting the “SEL” button until you find the setting you want to adjust and then hitting the “SET” button or up and down arrows to make adjustments. We found this system for making adjustments to be intuitive and easy to use.
Extra Features
The 62 MAX+ provides all of the extra features you would come to expect from a unit in its price range. Of course, you can always use it to just measure a single surface temperature – hold down the trigger over one location and then release it to measure the temperature at that one location.
But you can use it in other ways also. You can hold down the trigger to scan multiple locations. When doing so, the 62 MAX+ can show you the average, minimum, and maximum temperature measured during the entire time you were holding down the trigger. It also features a high and low temperature alarm, the ability to switch between Celsius and Fahrenheit, and a rather unique setting that will shut the unit off automatically after the trigger has been held down for more than 10 minutes (to save battery life if something in your toolbox is pressing up against the trigger in storage, for example).
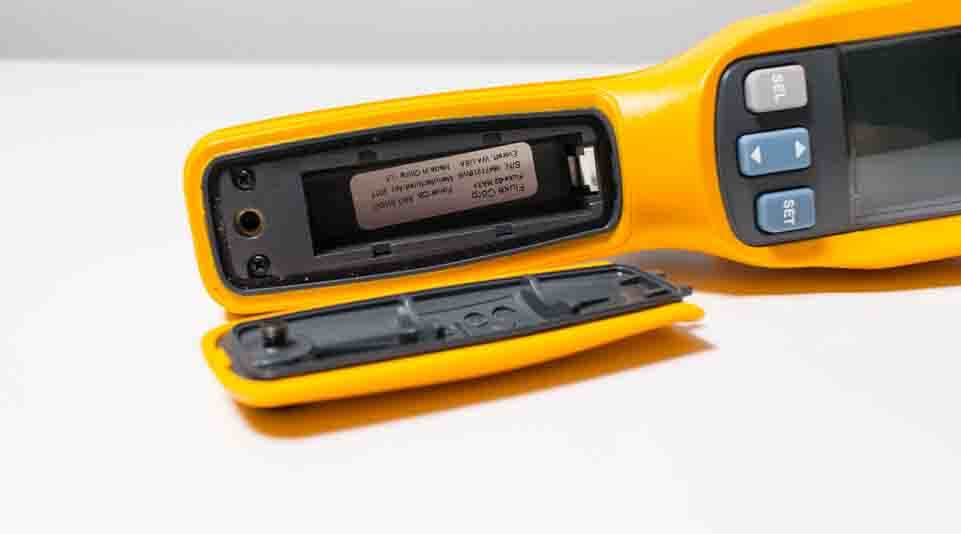
Battery
The Fluke 62 MAX+ runs off of a single AA battery. It comes with one Duracell AA battery so you won’t need to make any extra purchases before using it. Battery replacement is a little more complicated than you might expect –a screwdriver is required to access the battery compartment. But this is necessary to keep the thermometer water resistant.
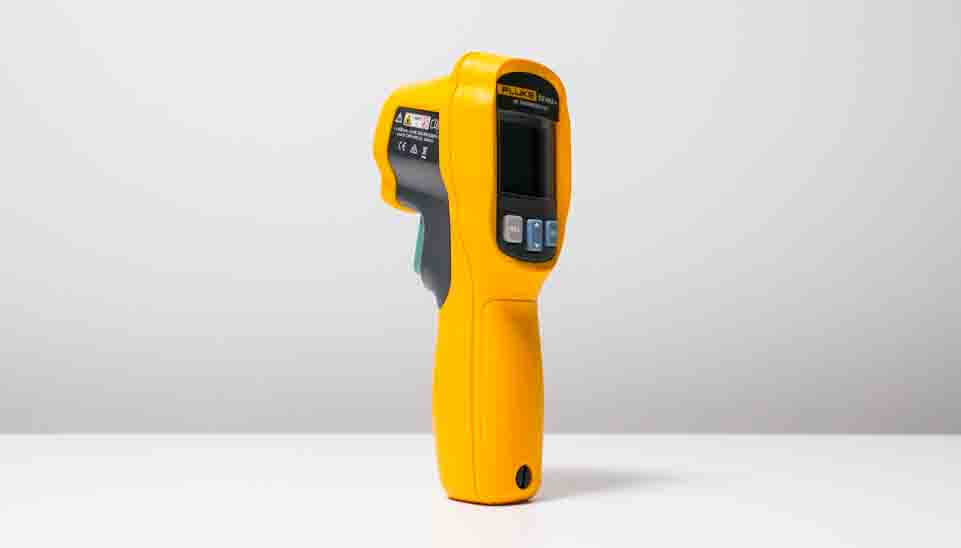
Size and Shape
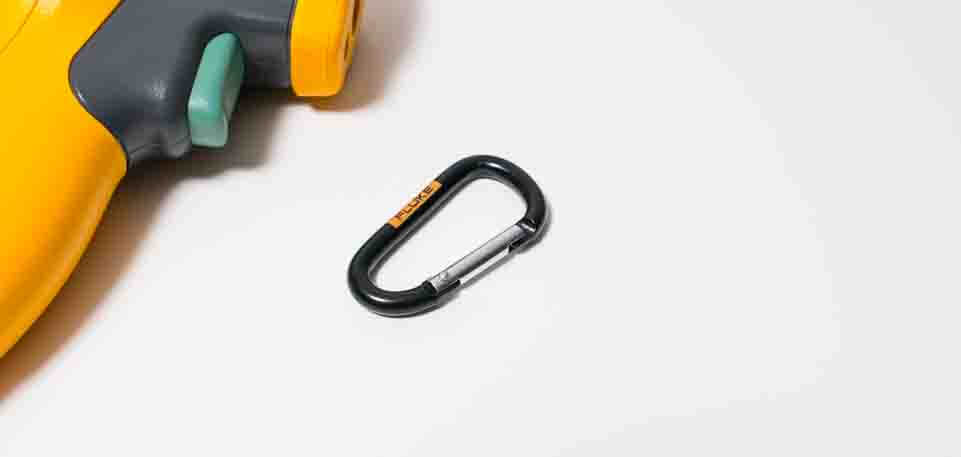
The 62 MAX+ feels great in the hand and is small and light enough to easily clip onto a tool belt for professional use. A clip is even included for that purpose.
Durability and Warranty
Handling the Fluke 62 MAX+ side by side with budget units it’s immediately evident that the Fluke is a much better built, much higher quality tool. The Fluke is covered head to toe in a rubberized material that will save it from cracks or any other damage should you drop it. Fluke claims that this unit has been drop tested up to 9.8 ft. Budget units have hard plastic bodies that are sure to crack if you drop them on a hard surface from any height more than a few feet above the ground.
As we noted earlier the Fluke also has a much higher quality LCD screen than budget units. The screen also has much better viewing angles.
It would be remiss of us not to mention that the 62 MAX+ is IP54 certified. This means that the thermometer has been manufactured in a way that makes it resistant to water and/or dust damage. The same cannot be said for any of the budget IR thermometers we tested. None are IP54 certified.
Finally, the 62 MAX+ comes with a 3 year warranty. Most budget models don’t come with anything more than a 2 year warranty.
Conclusion
The 62 MAX+ gets accurate readings fast. Press down on its trigger and you get an accurate reading almost instantaneously. Its high quality display is easy to read, backlit if you want it to be, and is large enough to provide supplemental data like the current emissivity setting and the maximum, minimum, or average temperature of the scanned surface without issue.
The 62 MAX+ is a durable professional tool that should give the average user many years of use. Something that cannot be said about any of the budget IR thermometers we tested.
Among all of the IR thermometers we tested, the 62 MAX+ does the best job of properly balancing features, functionality, durability and price. Yes, there are less expensive thermometers out there. But their lower price comes at the cost of much lower durability and reduced overall performance (many have fixed emissivity, are slow to read temperatures, and show sporadic final readings).
We recommend the Fluke 62 MAX+ as the best IR thermometer for most users.
Etekcity 630
Emissivity
The Etekcity 630 is one of very few budget IR thermometers we tested that features adjustable emissivity. At the beginning of this guide we discussed the downsides of buying a thermometer with fixed emissivity. Basically, it boils down to this: Units with fixed emissivity are terribly inaccurate when measuring the temperature of any material that doesn’t have an emissivity value close to 0.95 – the value fixed emissivity IR thermometers are usually set to. If you want an IR thermometer that can give you accurate readings no matter what material you’re measuring, a unit with adjustable emissivity (like the Etekcity 630) is really the only way to go.
Accuracy
The Etekcity 630 is specified by its manufacturer to be accurate to within plus or minus 2° C at temperatures at or below 100° C and within 2% at temperatures at or above 100° C.
Our hands-on testing of the 630 showed it to be very close to as accurate as its manufacturer claims that it is, with a few caveats.
Here’s the problem. The 630 can be quite slow to take readings and when it finally settles on a reading the displayed temperature sometimes jumps between the actual reading and another reading 10 to 20 degrees more or less than the actual reading.
What do we mean when we say it can be slow to take readings? Well, the moment you hold down the trigger of a professional grade IR thermometer (like the top rated Fluke 62 MAX+) it immediately shows a reading. Budget thermometers like the 630 don’t work in quite the same way.
When you first press down on the 630’s trigger its LCD display does activate. It’s backlight will turn on and warning symbols and the like will display immediately. However, the temperature readout doesn’t display until a few seconds later.
When it does finally display a temperature this initial temperature readout is often highly inaccurate. This isn’t the case at room temperature but is often the case at extreme temperatures.
In other words, if you measure the temperature of a surface with an actual temperature close to room temperature the 630 will display an initial reading very close to the final reading. But, if you measure the temperature of anything above a few hundred degrees F or well below freezing, it will show an initial reading at least 10 to 20 F above or below the actual temperature. The reading will then slowly move up or down until it settles on a final temperature.
Sometimes, it will jump between a measurement close to the initial reading and the final reading. This can cause confusion if you’re not sure what the actual reading should be. During testing we knew the exact temperature of the surface we were measuring so this jumping back and forth between two temperatures wasn’t a concern for us. We knew the actual temperature so we could tell which of the two temperatures the 630 would “jump” between was the correct temperature. The average user won’t have this luxury and might be confused by the two temperature readouts.
Distance to Spot Ratio
The Etekcity 630 has a distance to spot (D/S) ratio of 16:1 – very impressive for its price point. In the world of professional grade IR thermometers, the higher the D/S ratio, the higher the price of the thermometer. For Etekcity to be able to manufacture a budget IR thermometer with a higher D/S ratio than many professional grade units more than double, triple, even four or five times its price is actually quite the accomplishment.
That being said, this higher ratio isn’t much of an improvement over units with say a 12:1 or even a 10:1 D/S ratio. For example, there’s a very minor difference between the spot size provided by the 630’s 16:1 D/S ratio compared to the spot size provided by the Fluke 62 Max+’s 12:1 ratio. If you were to compare the spot size provided by the Fluke 62 Max+’s 12:1 ratio to the $700+ Fluke 572’s 60:1 ratio you would see a dramatic difference. But 16:1 compared to 12:1 compared to even 10:1 isn’t much of a difference at all.
In case you forgot…
Recall that an IR thermometer’s D/S ratio describes the relationship between
- the distance between the surface being measured and the thermometer and
- the size of the spot on the surface being measured.
The higher the D/S ratio, the smaller the spot being measured and the further away the thermometer can be from the surface being measured with an acceptable spot size. For example, a 50:1 D/S ratio thermometer can measure a 1 ft. spot from 50 ft. away. You’d need to be 10 ft. away from the surface to measure the same size spot with a 10:1 D/S ratio thermometer.
Lasers
The 630 features dual lasers. Dual laser technology allows you to not only see the location of the spot you’re measuring but also the exact size of the spot – the two lasers show the edges of the spot. Most other budget IR thermometers we tested come equipped with only one laser. The single laser only show the location of the spot, not the size of the spot. With these units it’s up to you to estimate the size of the spot you’re measuring.
Everything Else
Temperature Range
The Etekcity 630 can measure surface temperatures between -58 F and 1076 F. This range should be adequate for the majority of applications.
Ease of Use
The Etekcity 630 features a very large display for a budget IR thermometer. You can also set it to be backlit to improve the clarity of readouts.
Etekcity claims that the 630 has a 500 ms response time but in practice it takes more than 2 seconds for the thermometer to display even an initial temperature reading.
Once you release the trigger after taking a measurement the 630’s display stays on for about 15 seconds – more than 10 seconds longer than the top rated Fluke 62 MAX+’s display stays on after releasing its trigger. This extra time is useful if you need to reference the read temperature more than a few seconds after taking a reading. The only downside here is that the 15 seconds that the display stays on does have a negative impact on the unit’s battery life.
Managing different modes and settings on the 630 is fairly simple. Pressing the “MODE” button cycles through all of the thermometer’s features. Pressing the up and down arrow buttons adjusts the settings for all of these features. One quirk we didn’t like? There’s only one button to do all of the following:
- Turn the backlight on/off
- Turn the lasers on/off
- Set the thermometer to C or F
To switch between C and F you have to hold down the button for 3 seconds. Doing so also affects the backlight and laser settings as pressing the button once turns both the backlight and lasers off, pressing it again turns only the backlight on, and pressing it a third time turns both on.
Extra Features
The 630 has many of the same extra features as all of the professional grade IR thermometers we tested, including the Fluke 62 MAX+. The 630 can be set to display:
- Max temp.
- Min. temp.
- Average temp.
- Difference between max. and min. temp.
- High temp. alarm
- Low temp. alarm
Battery
The 630 comes with a 9V battery. To access the battery compartment you need to pull forward on the front on the thermometer’s handle. The front of the handle swings forward to reveal the compartment. Wires extend from the inside of the compartment to a bracket that fits over the top of the battery. During testing, we found it was very easy for these wires to get pinched by the part of the handle that swings back and forth to open and close the battery compartment.
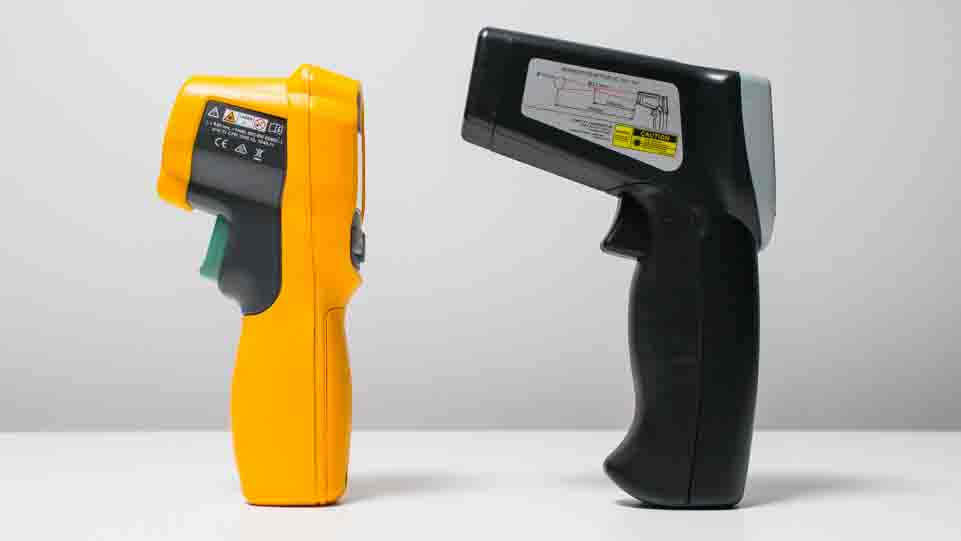
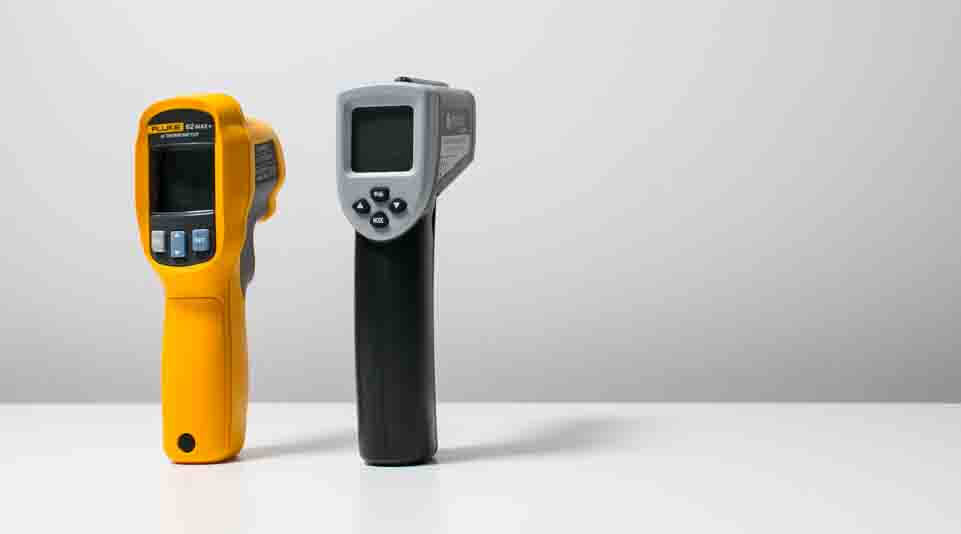
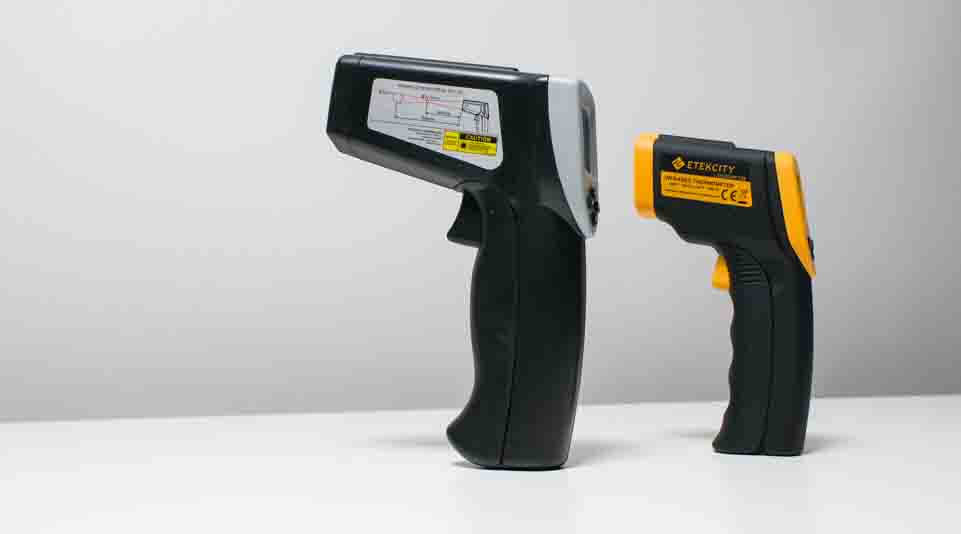
Size and Shape
The Etekcity 630 is not a small compact thermometer. Compare its size to that of the top rated Fluke 62 MAX+ in the photo below.
Durability and Warranty
When comparing it side by side next to a professional grade thermometer like the Fluke 62 MAX+ it’s clear that the 630 was manufactured with low cost as a priority. This shows when you closely observe its build quality. To be blunt, it isn’t very good.
The 630’s hard plastic housing is sure to crack should you drop it on a hard surface. Its LCD display is also very clearly of a much lower quality than displays on more expensive more professional grade thermometers.
The 630 does come with a 2 year warranty and consumer reviews show that Etekcity is a great company to deal with should you actually need to use the included warranty.
Conclusion
The Etekcity 630 is not the second best IR thermometer we tested – not even close. Why then, does it sit so high – at #2 on our list?
The answer is simple: price. The 630 normally retails for around $25. It was the only IR thermometer we tested that features adjustable emissivity, average, maximum, and minimum temperature, and dual lasers at this price point.
Yes, this thermometer does have its problems. And we absolutely do not recommend it for professional use. But, if you’re willing to accept its quirks and you’re willing to replace it if and when it breaks it provides a tremendous value that’s difficult to walk away from.
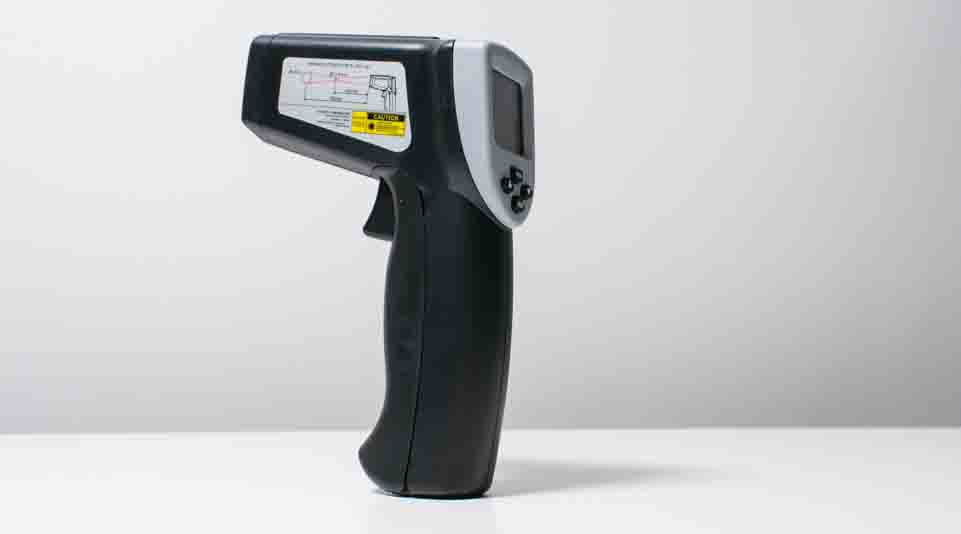
Etekcity 774
Emissivity
The Etekcity 774 does not feature adjustable emissivity. It’s locked at an emissivity value of 0.95. This means that the 774 will only give accurate readings for materials with an emissivity value at or close to 0.95. During testing, we found it to be quite accurate reading the temperature of common household items like paper, paint, and food near room temperature. Not surprisingly, all of these items have an emissivity value close to 0.95. Needless to say, when we used the 774 to measure more reflective objects with lower emissivity values (polished aluminum, for example), it’s readings were highly inaccurate – often 10, 20 up to 100 degrees above or below the actual temperature.
Accuracy
The Etekcity 774 has the same accuracy specifications as the Etekcity 630: it’s accurate to within 2% of measurements taken above 100 C and it’s accurate to within plus or minus 2° C of measurements taken below 100° C.
The 774 was one of only a handful of IR thermometers we tested that did not provide the same accuracy claimed by manufacturer specifications. According to the specs listed above you would expect the thermometer to be accurate to within 6° F at measurements taken around 300° F (2% of 300° F is 6° F), 8° F at measurements taken around 400° F and so on and so forth. Our testing showed that the 774 was only accurate to within 15° F at readings around 300° F, and only accurate to within 25° F at readings above 400° F.
The Etekcity 774 is not recommended for measuring materials at extreme temperatures
Our tests showed that the 774 is highly inaccurate at high temperatures. And it’s limited temperature range (more on that further down below) makes it inoperable at extremely high temperatures (above 716° F). The 774 is not recommended if you need to take readings of anything above a surface temperature of 300° F.
At lower temperatures the 774 tested quite well. Below freezing, around room temperature, and even up to 300° F it was quite accurate. At these temperatures it was well within the manufacturer specified accuracy range of 2% and/or plus or minus 2° C of the total reading.
Temporary Accuracy
The Etekcity 774 exhibited much of the same behavior as the 630 when taking measurements at extreme temperatures (within its operating range). Especially at higher temperatures it would often give an initial reading much higher than its final reading. It would also sometimes “bounce” back and forth between the correct reading and another incorrect reading 10 to 20° F above or below the correct reading.
Distance to Spot Ratio
The 774 has a D/S ratio of 12:1. This is the exact same ratio as that of the top rated Fluke 62 MAX+, meaning that the 774 measures the exact same size area at the same distances as the Fluke.
Recall that a high D/S ratio is desirable because it provides two main benefits:
- It allows for taking more precise measurements as a high D/S ratio equates to a very small measured spot size
- It allows for the thermometer to be used in scenarios where you need to be far away from the surface that you want to measure
As was true for the Fluke, we feel the 774’s 12:1 D/S ratio is more than sufficient for the vast majority of applications. Only look to purchase a thermometer with a higher D/S value if you know that you’ll need it for a very specific application and you’re prepared to spend a good amount of money for it.
Lasers
The 774 comes equipped with only one laser. The laser shows the location of the spot being measured.
Everything Else
Temperature Range
The Etekcity 774 can read surface temperatures between -58° F and 716° F. There are few if any applications where you’ll need to read temperatures below -58° F. There are, however, many applications that may require you to read temperatures above 716. That being said, for most applications around the house you’ll be just fine being able to read temperatures between -58° F and 716° F.
Ease of Use
The 774 has one of the smallest displays of any of the IR thermometers we tested.
The 774 has a manufacturer specified response time of 800 ms but suffers from the same delayed activation and temperature readout as the 630.
Like the Etekcity 630, the 774 shut off about 15 seconds after you release its trigger.
Managing the 774’s extra features is really simple, mostly because it doesn’t really have many extra features. The 774 has three buttons and each does only one thing. More on that below.
Extra Features
Both the top rated Fluke 62 MAX+ the Etekcity 630 allow you to hold down their triggers, scan over a large area or even several surfaces, and then are able to tell you the average, minimum, and maximum temperatures of the area/surfaces that were scanned. The 774 doesn’t feature this functionality.
The 774 is a very basic IR thermometer. It has three buttons.
- The left most button allows you to alternate between the thermometer displaying temperature in Fahrenheit and Celsius.
- The center button allows you turn the laser on or off.
- The right most button allows you to turn the display’s backlight on or off.
Battery
The 774 comes with a 9V battery. We have to give Etekcity credit here for including a battery even at the 774’s extremely low price point. To install the battery you have to pull forward the battery lid - the whole front of the thermometer’s grip. The 9V battery installs fairly easily although you have to be careful not to pinch the wires that extend from the thermometer to the bracket that fits over the battery when closing the battery lid.
Size and Shape
The 774 is small and compact – one of the smallest IR thermometers we tested.
Durability and Warranty
The 774 isn’t very well made but this is to be expected at its incredibly low price point. It’s build quality isn’t anywhere close to that of the professional grade IR thermometers we tested. The unit does come with a 2 year warranty and excellent customer support from the manufacturer.
Conclusion
The Etekcity 774 is cheap – very cheap. Its extremely low price is the only reason why it finds its way into our top 3. If you want the least expensive reasonably accurate IR thermometer on the market the 774 is your best option.
Verdict
Our bottom line recommendations.

The top 3 IR thermometers we tested fit the needs of three very different types of consumers.
The Fluke 62 MAX+ is a professional grade IR thermometer. It scans and delivers temperature readings fast. It does so accurately and it does so in a housing that’s built to last.
The Etekcity 630 is a budget IR thermometer. But that doesn’t stop it from packing in all the features you get in a professional grade thermometer. Where it suffers is with accuracy and precision and delivering temperature readings fast.
The Etekcity 774 is the least expensive IR thermometer we tested. It has very few of the features of more expensive units. But it still measures temperature and does so reasonably well. Just don’t try to use it to measure any material that doesn’t have an emissivity value close to 0.95. If you do you’d be better off estimating the temperature of the surface yourself than trying to use the thermometer to do it.
Fluke 62 MAX+
Get the Fluke 62 MAX+ if you need an IR thermometer for professional work (HVAC, manufacturing, etc.) or if you’re an average consumer looking to purchase a high quality highly accurate and reliable IR thermometer that’s still reasonably priced.
Etekcity 630
Get the Etekcity 630 if you’re an average consumer looking for an IR thermometer to take temperature readings of a wide variety of different materials (the 630 features adjustable emissivity for this purpose) and you don’t care about the thermometer being extremely accurate, durable, or reliable.
Etekcity 774
Get the Etekcity 774 if you’re unsure if you want to invest in a more expensive IR thermometer or you just want to take surface temperature readings for your own enjoyment. The 774 does work. It will take fairly accurate readings of many common household materials. Just be aware of its limitations and don’t try to use it for any serious applications.
FAQ
Always remember: an IR thermometer only measures the surface temperature of an object – never its internal temperature.
To measure the temperature of soups or any other liquid an IR thermometer works great. To measure the internal temperature of solid foods – not so much.
Note: an IR thermometer works great as a candy thermometer – to temper chocolate, for example - or for measuring the temperature of lye when making soap.
Again, an IR thermometer only measures surface temperature. It can certainly tell you the temperature of your skin’s surface. But if you need to determine whether you have a fever or not you’ll need to measure your body’s internal temperature and for that you’ll need an oral or rectal thermometer.
The 62 MAX+ and the 62 MAX are nearly identical IR thermometers. They certainly look identical. The differences between these two units are the following:
1. The MAX+ is slightly more accurate (within 1% of the reading for the MAX+ vs 1.5% of the reading for the MAX at most temperatures)
2. The MAX+ has a wider temperature range (up to 1202 F for the MAX+ vs up to 932 F for the MAX)
3. The MAX+ has a quicker response time (300 ms for the MAX+ vs 500 ms for the MAX)
4. The MAX+ has a better D/S ratio (12:1 for the MAX+ vs 10:1 for the MAX)
We feel that all of these differences are enough to recommend the MAX+ over the MAX, despite it being slightly more expensive.
Add a Comment
Have a question or comment? Let us know below.
Comments